
Tips & Ideas

Southeast Iowa home-based business owners usually notice the squeeze long before they admit it: orders are up, the dining table is “temporarily” covered in supplies, and every workday starts with a game of moving piles. The real culprits aren’t laziness or lack of grit, they’re small business growth meeting a layout that was never built for shipping stations, client calls, or team help, and those business expansion challenges turn simple tasks into constant friction. When workspace optimization hits a hard limit, upsizing residential property stops feeling like a guilty splurge and starts looking like a practical upgrade. A bigger home can make the business run calmer and cleaner. ## Choose a Bigger Home That Fits Your Business Here’s how to move from cramped to confident. This process helps Southeast Iowa homeowners upgrade into a larger home that supports a growing business without wrecking daily life or your maintenance budget. You will know what you can afford, what to watch in the market, and how to judge each property like a practical owner, not just an excited shopper. Step 1: Define what “bigger” needs to solve Start with define your vision in plain language: what work activities must happen at home, and what home life needs protecting. Write a short must-have list (separate room, storage, parking, quiet calls) plus nice-to-haves so you do not get distracted by shiny finishes. Step 2: Set a purchase budget and a monthly “real life” budget Use a tool to estimate a home price range and then pressure-test it with utilities, insurance, commuting, and routine upkeep. If the numbers only work on your best month, tighten the range now so you do not buy yourself stress. Step 3: Track the market for 2 to 4 weeks before you tour hard Pick a few target neighborhoods and watch list prices, days on market, and how often homes go pending. When existing home sales rise, good fits can move faster, so a short trend-watching window helps you act quickly without panicking. Step 4: Research listings like an owner, not a visitor For each home, scan photos and disclosures specifically for business-friendly bones: electrical capacity, basement moisture, storage potential, and a path for deliveries that will not trample your living space. Bring a simple checklist to showings so every property gets the same fair review. Step 5: Confirm the location works for both work and weekends Do a drive-by at different times and note noise, parking, lighting, and how easy it is for clients or carriers to find you. If a spot forces constant workaround behavior, it will wear you out even if the house is perfect. A little structure now makes the “right house” feel obvious when you see it. Design a Home Office That Can Handle Next-Year You A bigger house is exciting, until your business stuff starts colonizing every flat surface. Use these tips to turn “I need more space” into a real, workable home office plan that fits your budget and gives your business room to grow. Sketch your workflow before you buy furniture: List your weekly tasks in order (shipping, calls, filming, bookkeeping, inventory) and assign each one a “home.” A simple layout rule: keep your most common task within one swivel of your chair, and put messy tasks (packing, product testing) closer to a hard floor and a door. This keeps you from wasting steps and helps you judge whether that “extra bedroom” you budgeted for will truly function as your HQ. Build storage that scales (without eating the room): Start with three zones: daily-use (desk drawers), weekly-use (shelf or cabinet behind you), and long-term (closet or labeled totes). Leave 20–30% empty space on shelves on purpose, future inventory always arrives faster than we expect. If you handle physical products, add one dedicated “incoming” bin and one “ready to ship” spot so orders don’t mingle with returns and random life clutter. Plan your tech like a mini utility system: Pick one “network corner” where the modem/router, power strip, and cable management live, then run everything else from there. Put your computer and internet gear on a battery backup, and label cords so troubleshooting doesn’t become an evening hobby. Before you commit to a room, verify you have enough outlets and that your Wi‑Fi is strong at the desk, the packing table, and any spot you take calls. Create privacy and sound control with simple layers: If you’re on client calls, treat the office like a bedroom: door that shuts, a solid rug, and thick curtains or a fabric wall hanging to cut echo. A white-noise machine outside the door can help, and weatherstripping is a surprisingly cheap “sound upgrade.” If the only possible office is near the kitchen, schedule call blocks and add a visual “do not disturb” sign so your household knows when you’re “in session.” Refresh the space so you actually want to work there: A quick coat of paint, decent lighting, and a clean desktop can change your whole attitude about logging on. The idea behind refresh your office space is simple: when the room feels calm and intentional, it’s easier to start (and finish) work. Set a 30-minute weekly reset, trash out, papers filed, shipping supplies topped off, so Monday doesn’t begin with a scavenger hunt. Set “leader habits” that keep the office from running you: Growth usually adds decisions, not just sales, so build routines that protect your brainpower: a daily top-three list, a weekly money/admin hour, and a standing “process improvement” note where you jot what broke this week. Research connecting resilient leaders with growing businesses is a good reminder that your workspace should support steadiness, clear surfaces, clear systems, clear priorities. When you act like the future boss of a bigger operation, your home office starts behaving like one, too. Once the room, storage, and tech are mapped, you can turn the plan into a setup checklist, so moving day doesn’t feel like you’re rebuilding your business from scratch. Plan → Pack → Settle → Tune Your New HQ To keep it simple, use this weekly rhythm. This workflow helps southeast Iowa homeowners move into a bigger home without your business going dark for a week. It gives you a calm order of operations so you can keep serving clients, find what you need fast, and avoid the classic “where did the labels go?” spiral. Think of it like a renovation sequence: prep, protect, install, then adjust. Stage \ Action \ Goal Map the work List critical tasks, tools, and deadlines No surprises about what must keep running Coordinate helpers Use formulate a relocation team for Everyone knows who does what and when roles and timing Pack by function Box by task zone, label, and stage You can ship, bill, and answer calls immediately essentials separately Move and verify Test internet, outlets, lighting, and Day-one operations work without troubleshooting shipping flow marathons Reset and improve Note bottlenecks, adjust layout, The space gets easier to run each week schedule a weekly tidy Run the stages in order, but keep them looping: what you learn during setup becomes next month’s better packing list and layout tweaks. When roles are clear and essentials stay accessible, the move feels like progress instead of disruption. Start small, follow the stages, and let momentum do the heavy lifting. Quick Answers for Upsizing Without the Panic A few calm answers for the big “what ifs.” Q: What are the most important features to look for in a larger home to ensure it meets both my family's and my home office needs? A: Start by naming your biggest pressure point: cash flow, quiet focus, or client access. Then look for a layout with a door you can close, strong natural light, and enough storage so work gear does not spill into family space. Bonus points for a separate entry or nearby half bath if you ever meet clients at home. Q: How can I effectively research and compare different neighborhoods to find the best location for a home-based business setup? A: Pick two “non-negotiables” first, like reliable internet options and easy parking or delivery access. Drive the area at the times you actually work, then test cell signal and note noise, lighting, and winter maintenance on the street. If cash flow is the pressure, compare total monthly costs, not just the mortgage. Q: What strategies can I use to minimize disruption to my daily routine and business operations during the moving and setup process? A: Protect your revenue first by keeping one “mobile office kit” with laptop, chargers, paperwork, and your top tools in a single bin that never gets packed away. Schedule your move around your busiest client days and batch tasks so you are not switching gears every hour. If permits or utility scheduling is the stressor, book those appointments early and build in a buffer day. Q: How do I assess the specific renovations or technology upgrades my new home might require to support a productive work environment? A: Walk the house like a contractor: count outlets, check lighting at your working hours, and note where noise travels. For tech, confirm modem location, Wi-Fi coverage, and whether you need a hardwired connection for calls or uploads. If you are unsure, a quick consult with an electrician or handyman can turn guesswork into a clear punch list. Q: If I am feeling overwhelmed by managing both my growing home-based business and the complexities of upsizing my home, what steps can I take to develop stronger leadership and organizational skills? A: Shrink the problem by choosing one decision driver each week, like cash flow or client access, and make a simple checklist for only that category. Track a few basic numbers, because businesses that lead with data can make decisions faster and with less second-guessing. If you want extra structure, consider earning an mba degree or flexible online leadership or project-planning courses built for working adults. You have got this, one smart decision at a time. Choosing a Bigger Home That Supports Your Business Growth When home and business start tripping over each other, laundry pile meeting client files, it’s hard to grow without feeling squeezed. The way through is the same calm approach used all along: motivational home upsizing with clear priorities, confident relocation strategies, and a plan for balancing home and business without overthinking every decision. Done well, the move creates space to work, breathe, and keep serving customers while setting up a future-proofing workspace for the next season of business growth encouragement. Pick the space that fits your next chapter, not your last one. Schedule one tour and bring a short must-have list, then let the right layout make the choice easier. That extra room isn’t just square footage, it’s stability, energy, and momentum for whatever comes next.
For new residents who suddenly find themselves juggling leases, mortgages, and a seemingly endless to-do list, adjusting to a new town can feel like living inside a dozen open tabs. The relocation challenges are real: decision fatigue over every tiny purchase, awkward loneliness between boxes, and the emotional impact of moving that hits at random, usually when the coffee maker goes missing. Renters and homeowners alike run into the same settling-in struggles, because “home” isn’t just an address; it’s routines, comfort, and a sense of control. With a calmer, more practical mindset, settling in can start feeling doable. Quick Summary: Settle In Faster ● Start unpacking strategically by tackling essentials first, then setting up the rooms you use daily. ● Get to know the neighborhood by taking short walks and trying a few nearby go-to spots. ● Find essential services early, like doctors, pharmacies, grocery stores, and reliable home help. ● Join local community life through events, groups, and friendly hellos to build connections quickly. ● Create little routines and comforting touches at home so the new place feels like yours sooner. Build Your First-Week Routine: Unpack, Explore, Connect, and Set Up Services The first week in a new place can feel like living out of boxes with a side of “where did I put the scissors?” energy. A simple routine, unpack a little, explore a little, connect a little, and set up the basics, turns the chaos into a plan. Do a “priority unpack” in zones, not rooms: Pick three zones to make functional first: sleep (bed + sheets), hygiene (bathroom basics), and food (one clear counter + coffee/tea setup). Spend 30–60 minutes per zone, then stop, progress beats perfection. This matches the quick-reset idea: get the essentials working so your brain can relax and you can tackle the rest without frustration. Run a 15-minute “home efficiency sweep” each night: Keep one open bin for “put away later,” then do a quick loop: trash out, dishes in, boxes flattened, and tomorrow’s outfit set. You’ll wake up to a calmer space and avoid the slow creep of clutter that makes a new place feel temporary. If you’re planning any painting or small updates, set aside a single “project corner” so supplies don’t sprawl across the living room. Map a tiny neighborhood exploration plan (three stops, one hour): Choose three nearby places to visit in your first week: a grocery store, a park, and a casual takeout spot. The goal is repetition, go to at least one of them twice so it starts feeling familiar. Use a simple checklist mindset to explore neighborhood basics and you’ll quickly spot the shortcuts, parking patterns, and “oh, that’s where that road goes” connections. Use community centers and events as your social shortcut: Community centers, libraries, and recreation departments are basically cheat codes for meeting people without awkward networking pressure. Check the bulletin board or website and attend one low-stakes thing, open gym, a class, a volunteer day, a local talk. Give yourself a tiny mission like “learn one person’s name” or “ask for one restaurant recommendation.” Start networking in a new town with “micro-asks”: When you meet a neighbor, delivery driver, or fellow dog-walker, keep it simple: “We just moved in, who do you use for a handyman?” People love sharing local intel. Write down names immediately in a notes list labeled “House People,” even if you don’t need them yet. Line up local service providers before something breaks: In week one, schedule or research the boring-but-life-saving stuff: utilities confirmation, trash/recycling rules, internet setup, and one go-to for each category, plumber, electrician, HVAC, and a painter if you’re changing colors soon. Call or message two options, ask about typical response time, and save their numbers. Future-you will be very grateful the day the sink decides to audition for a waterfall feature. A week like this makes your home feel usable fast, and once the basics are running smoothly, it’s much easier to build small daily habits that make the whole town feel familiar. Habits That Make a New Place Feel Like Yours These habits turn “we just moved” into “we live here” by building comfort through repetition. They also help homeowners and renters pace small painting and update decisions without living in a never-ending project. The Two-Minute Morning Reset ● What it is: Make the bed, open blinds, and clear one surface. ● How often: Daily. ● Why it helps: A quick win makes the space feel intentional fast. One-Box, One-Decision Rule ● What it is: Empty one box, then choose to keep, donate, or store. ● How often: Daily or every other day. ● Why it helps: Fewer “maybe later” piles means the home feels settled sooner. Paint-and-Repair Notes Walk ● What it is: Do a five-minute lap and log scuffs, nail holes, and touch-ups. ● How often: Weekly. ● Why it helps: You plan upgrades calmly, not in a stressed scramble. One Hello a Day ● What it is: Greet a neighbor or staff member and ask one simple question. ● How often: Daily. ● Why it helps: Stanford says habits are easier when they’re small and repeatable. School-to-Home Recap ● What it is: Ask kids “one good thing, one hard thing,” then name tomorrow’s plan. ● How often: Weeknights. ● Why it helps: Predictable check-ins support kids’ confidence and routine. Pick one habit this week, then tweak it to fit your household. Quick Questions When You’re New and Unsettled Q: What are some practical strategies to efficiently unpack and organize my belongings without feeling overwhelmed? A: Pick one “comfort zone” first, like your bed and a clear kitchen counter, so the home works even mid-chaos. Unpack by category (linens, toiletries, tools) instead of by room, and keep a donation bag open for instant edits. If you rent, stash paint samples and spackle in a single bin so small touch-ups do not turn into a scavenger hunt Q: How can I start building a social network and meet new people in an unfamiliar town? A: Use low-pressure repeats: walk the same route, visit the same coffee spot, or show up to one weekly class so faces become familiar. Say one simple opener like “Any favorite hardware store around here?” and let locals give you the script. Consistency beats charisma. Q: What are effective ways to explore my new neighborhood to feel more at home quickly? A: Do themed mini-missions: “find a park bench,” “locate the closest pharmacy,” or “discover a takeout place for tired nights.” Snap photos of paint colors, porch styles, and landscaping you like for future updates without rushing decisions. Aim for 20 minutes, then stop while it still feels fun. Q: How can I manage the stress and uncertainty that often come with settling into a new community? A: Treat stress like a checklist item: schedule a 10-minute wind-down and keep it non-negotiable. Research on stress management interventions shows they can meaningfully reduce stress, so simple breathwork, journaling, or a quick stretch can genuinely help. Also, limit big renovation choices to one decision per week until your nervous system catches up. Q: What resources can I turn to if I want to start a small business or side project after moving to this new town? A: Start by inventorying your skills, your available hours, and what you want this season of life to feel like. The idea of Holistic Career Advancement can help you set a timeline that respects your home setup, family needs, and energy. If you want to shore up your management fundamentals as you build, a bachelor in business and management can provide a structured base in planning, operations, and leadership. Then pick one learning track for 30 days and build a tiny weekly routine before you scale. Settling In Faster by Building Comfort and Community Roots A new place can feel oddly “not mine” even after the boxes are gone, and that in-between stage can make everything feel louder than it needs to. The fix isn’t rushing, it’s a positive relocation mindset: make steady choices that support long-term adjustment while letting community belonging grow at its own pace. Do that, and creating home comfort becomes less of a project and more of a rhythm, making it easier to start thriving in a new town. Home happens when comfort and connection show up regularly. Choose one comfort upgrade today, paint a small wall, hang the familiar art, or set up the chair that says “this is my spot.” That small anchor builds the stability and resilience that make the next chapter feel genuinely livable.
For first-time homeowners, longtime homeowners, and renters trying to keep a security deposit intact, the hardest part of home care isn’t the big projects, it’s the steady drip of home upkeep challenges that show up when life is busy. A tiny leak, a funky smell, a drafty room, or a mystery rattle can quietly turn into an expensive, space-stealing headache when it gets ignored. The fix is a simple mindset shift: treat annual home maintenance like a seasonal home inspection that spots little problems while they’re still little. Done consistently, this habit supports property preservation year after year. Quick Summary for Annual Home Upkeep ● Clean gutters twice a year to prevent water damage and keep drainage flowing smoothly. ● Schedule one HVAC checkup each year to boost efficiency and avoid surprise breakdowns. ● Book an annual fireplace inspection to reduce fire risks and keep cozy nights worry free. ● Plan routine pest control to stop small infestations before they become big headaches. ● Test smoke and carbon monoxide detectors regularly so your home stays alert and safe. Knock Out Key Home Checks in One Weekend This walkthrough helps you hit the biggest annual maintenance basics, from gutters to HVAC, without turning your weekend into a renovation reality show. Homeowners and renters alike can use it to prevent small issues from becoming expensive surprises while keeping your place safe and comfortable. Step 1: Clear gutters and check downspouts. Start by scooping out leaves and gunk, then flush each gutter run with a hose so you can spot slow drains fast. Confirm downspouts push water away from the foundation, not into your flower beds or basement wall. If you find standing water, you just found a future leak. Step 2: Do a quick chimney and roofline scan. From the ground, look for cracks, missing caps, leaning sections, or anything that looks “off” around the chimney. Inspect your roof and chimney by scanning for loose pieces and obvious damage before water and critters take advantage. If you smell strong soot indoors or see crumbling masonry, put a pro visit on your calendar. Step 3: Run a simple HVAC mini-checklist. Swap or clean the air filter, clear dust from supply vents, and make sure the outdoor unit has breathing room on all sides. Turn the system on for 10 minutes and listen for new rattles, squeals, or weak airflow, because weird noises rarely fix themselves. If the thermostat fights you or rooms heat and cool unevenly, note it for a tune-up. Step 4: Walk the perimeter for pests and overgrowth. Circle the home and look for tiny gaps, frayed screens, wood touching soil, or little dirt tunnels that scream “free entry.” Trim tree limbs and shrubs back from the siding and roof so critters have fewer bridges and moisture dries faster after rain. Inside, check under sinks and behind appliances for droppings, chewed edges, or musty corners. Step 5: Hunt for sneaky leaks in 15 minutes. Check toilets for silent running, peek under every sink for damp cabinet floors, and look for water stains on ceilings and around window frames. Snap a photo of your water meter, avoid using water for 30 minutes, then check again to spot a possible hidden leak. Catching it early matters because hidden maintenance costs can land higher than expected. Small Maintenance Habits That Pay Off All Year A solid weekend checklist is great, but habits are what keep your home from quietly backsliding. These quick rituals make annual maintenance feel automatic, whether you own the place or just want your rental to run smoothly. Two-Minute Water Watch ● What it is: Glance at sinks, toilet bases, and under-cabinet floors for moisture. ● How often: Weekly ● Why it helps: Catching drips early helps avoid the cost up to $4 later. Filter Flip Reminder ● What it is: Set a recurring calendar alert to check HVAC filters and airflow. ● How often: Monthly ● Why it helps: Cleaner airflow can reduce strain and keep rooms more comfortable. Seasonal Safety Sweep ● What it is: Test smoke and CO alarms and replace weak batteries. ● How often: Quarterly ● Why it helps: You build routine safety checks without needing a big annual panic. Ten-Minute Outside Loop ● What it is: Walk the exterior to spot peeling caulk, clogged drains, or new cracks. ● How often: Monthly ● Why it helps: It supports preventive maintenance by finding small issues before failure. Try one habit this week, then tweak the cadence to fit your household. Quick Q&A to Keep Maintenance Low-Stress Got a few “am I doing this right?” questions? Q: How can I create a manageable schedule to keep up with all the necessary annual home maintenance tasks without feeling overwhelmed? A: Pick 10 to 12 “anchor tasks” and assign one to each month, then batch the rest into two seasonal weekends. Keep it simple: a repeating calendar reminder plus a one-page checklist on the fridge. If you miss a month, just roll it forward, not into a guilt pile. Q: What are the most common signs that indicate it’s time to get my HVAC system checked during annual maintenance? A: Watch for uneven room temps, new rattles or buzzing, musty smells, or energy bills that jump without a weather change. If the system cycles on and off a lot, that’s another nudge. When in doubt, schedule a check before peak heating or cooling season. Q: How do I safely inspect and maintain gutters and downspouts to prevent water damage to my home? A: Choose a dry day, use a sturdy ladder on level ground, and never overreach. Clear debris with gloves, then run water to confirm it flows fast and exits away from the foundation. If you see sagging sections or loose fasteners, fix those before the next heavy rain. Q: What simple steps can I take to identify and seal drafts around windows and doors to improve energy efficiency? A: On a windy day, pass a damp hand around the frames and feel for cool air, or hold a tissue and see if it flutters. Replace worn weatherstripping, add a door sweep, and touch up gaps with removable caulk. Do one doorway at a time and you’ll notice the comfort upgrade immediately. Q: How can I organize and keep track of receipts and expenses related to my home maintenance tasks to simplify budgeting and tax preparation? A: Keep a “repairs log” note where you record the date, what you did, and the cost right after the job, even tiny purchases. Then snap receipts weekly and sort into simple folders by year and category; a five-minute routine beats a shoebox surprise. A budget target like budgeting between $0.90 and $1.30, per square foot each year can also keep your spending expectations realistic. Turn Annual Home Maintenance Into a Habit That Protects Value Home maintenance has a sneaky way of piling up until it’s loud, messy, and expensive, especially when life’s already full. The calmer approach is simple: treat yearly maintenance planning like a rhythm, not a rescue mission, and keep leaning on proactive home care and regular home upkeep instead of last-minute panic. Do that, and the house stays predictable, your records stay tidy, and long-term property value gets quietly protected in the background. Small upkeep beats big repairs, every time. Pick one job to do this week and set a reminder for next year before you forget. That’s how a home stays steady, safe, and ready for whatever the seasons throw at it.
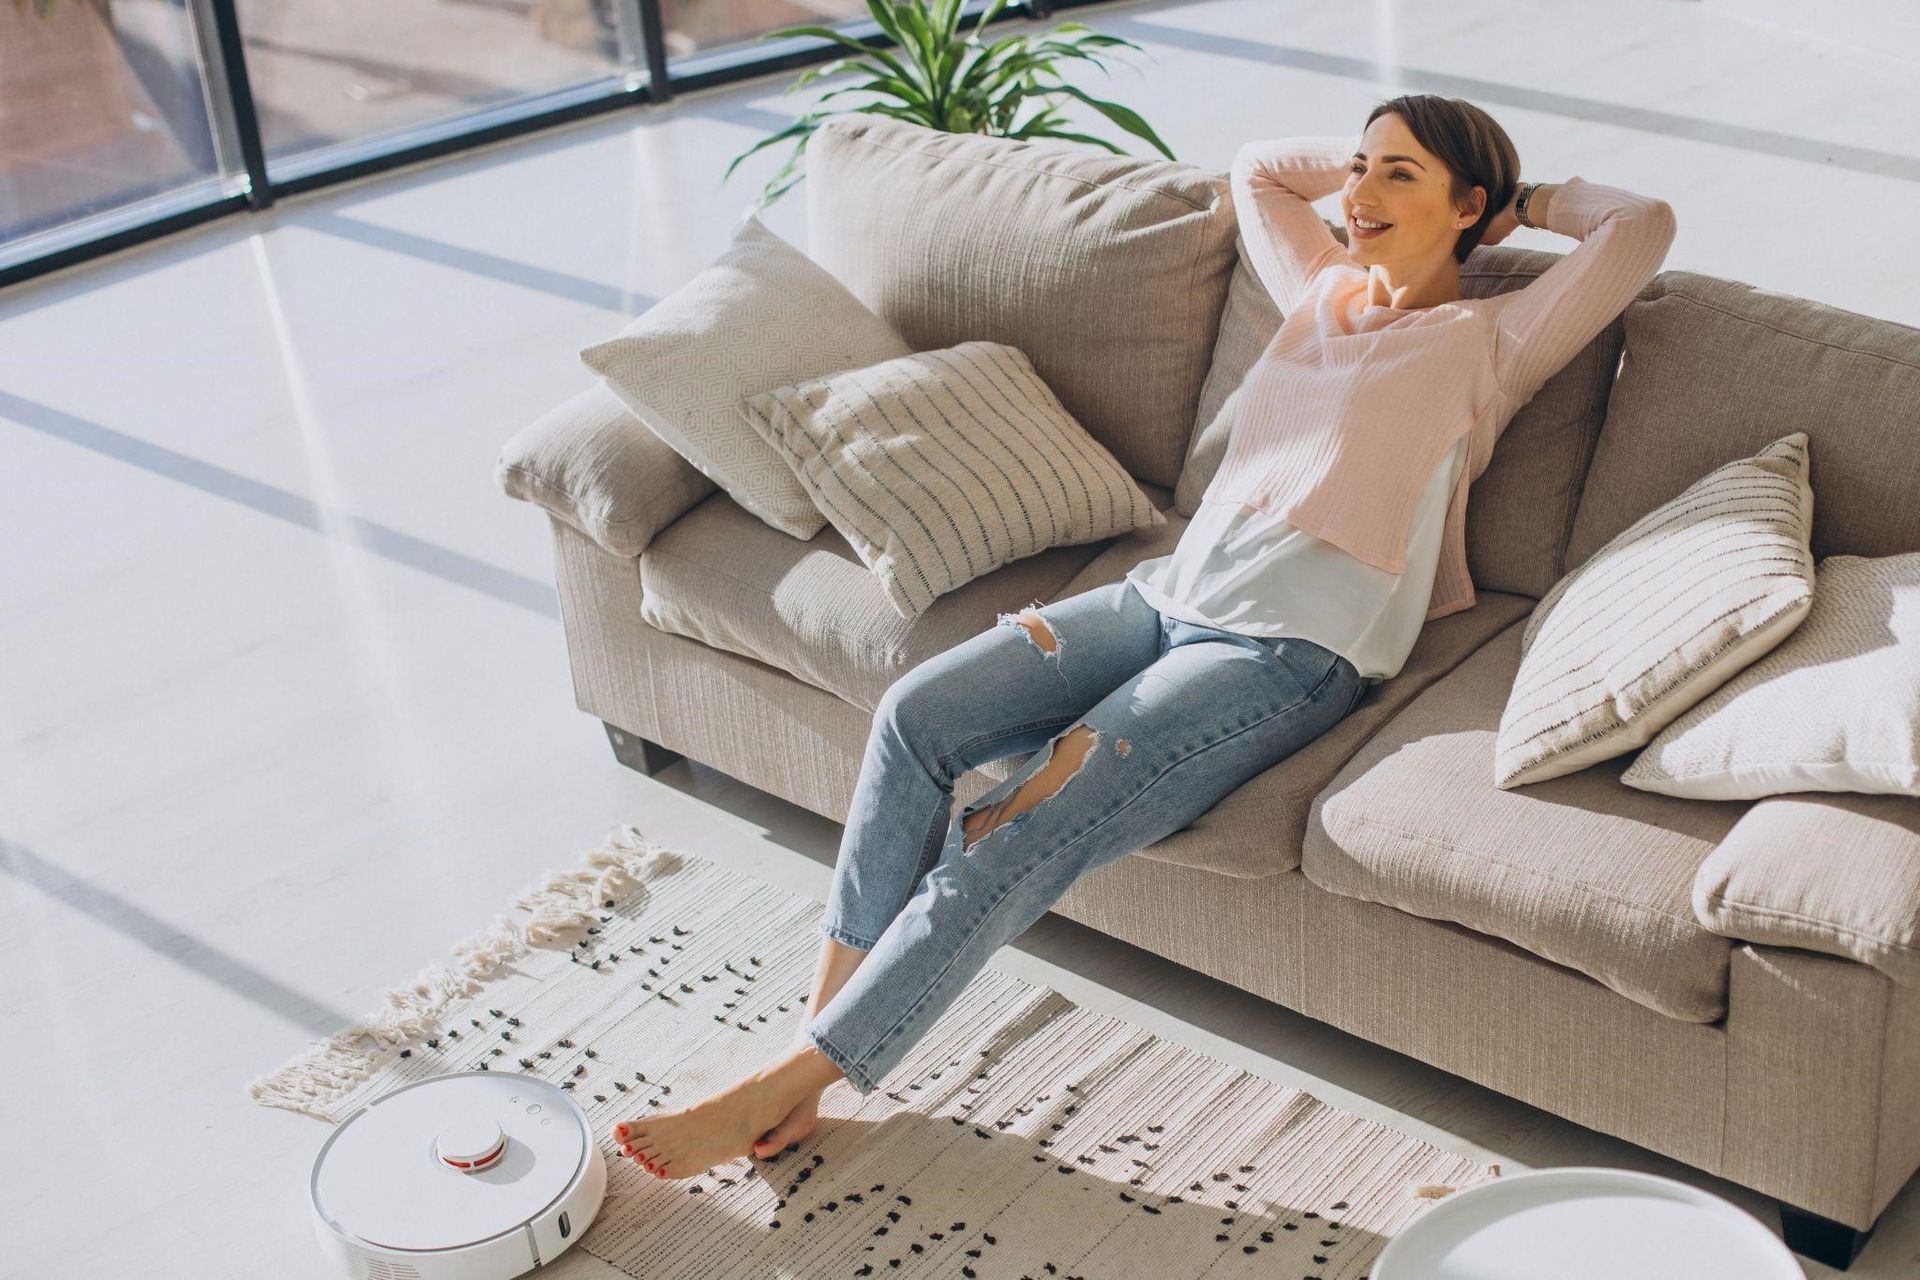
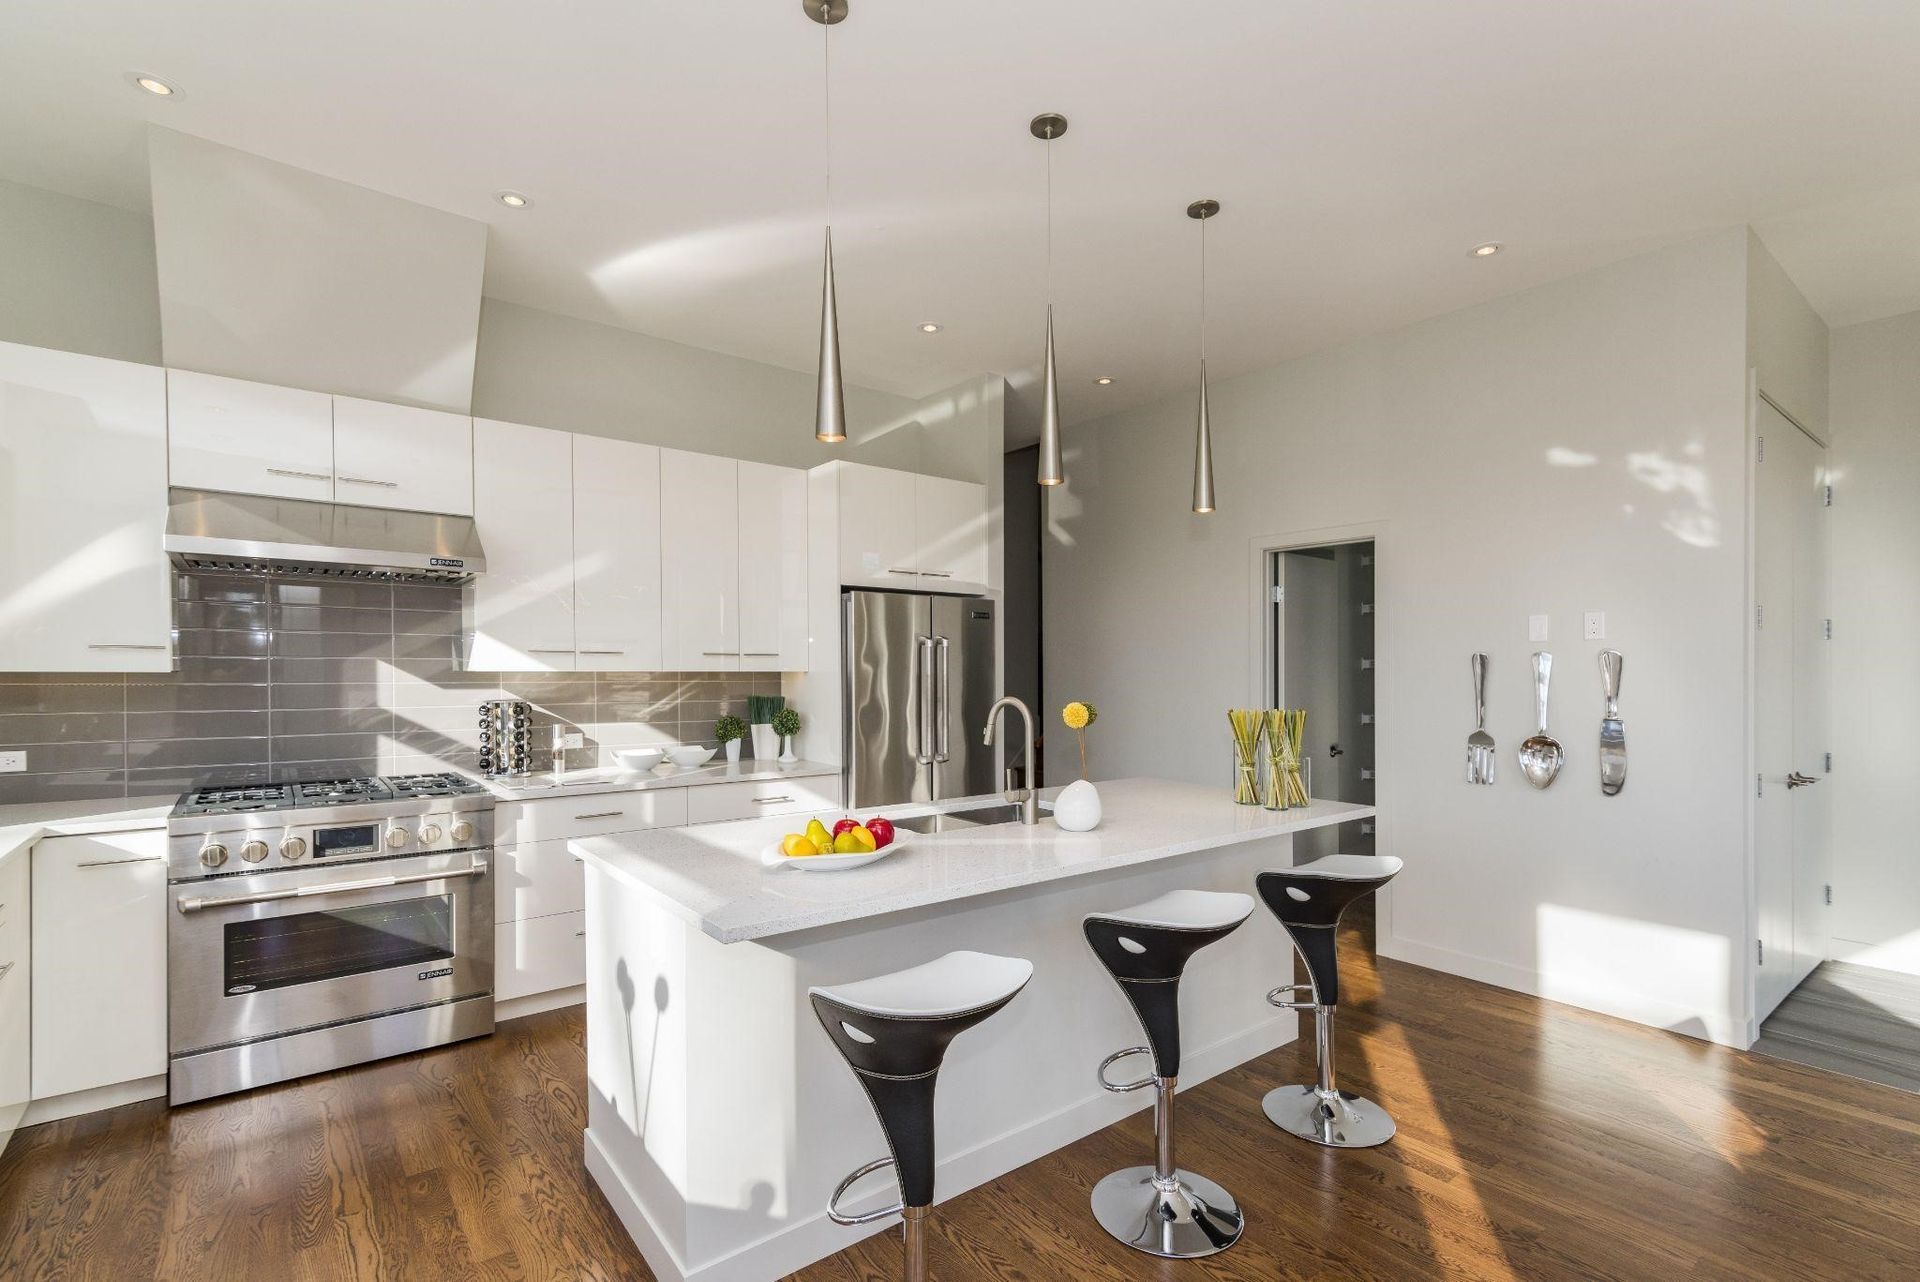
Homeowners everywhere are rethinking how their homes function now that workdays and downtime often happen under the same roof. The challenge is clear: a space that supports focus at 10 a.m. can feel intrusive at 8 p.m. With a few deliberate design and habit shifts, your home can support both productivity and genuine relaxation without feeling compromised. Key Takeaways ● Clear visual boundaries help your brain switch between work and rest. ● Small comfort cues matter as much as big furniture decisions. ● Systems and maintenance prevent disruptions that break focus. ● Intentional routines reinforce how each space is used. Starting With Zones, Not Square Footage You don’t need a spare room to create balance. What matters is defining zones with purpose. A desk facing a wall, a lamp used only during work hours, or a rug that anchors a seating area all signal different modes of use. These cues reduce mental friction and help you transition without physically leaving the room. How Soft Details Reset a Room’s Mood Hard edges dominate most work setups: screens, desks, chairs. Soft elements undo that feeling when it’s time to relax. Pillows, throws, and fabrics instantly shift a room’s tone and make it clear that work is done for the day. Tools like a custom pillow designer allow homeowners to create pieces that match their decor and personal style. This tool lets you upload photos, pick colors, and order finished pillows delivered straight to your home. That visual shift creates both comfort and a psychological boundary between tasks and downtime. Simple Habits That Make the Biggest Difference Consistency beats perfection when you’re sharing space between work and life: ● Power down your work equipment at the same time every day. ● Store work tools out of sight when the day ends. ● Change the lighting to warmer tones in the evening. ● Introduce one physical action, like fluffing pillows or closing a laptop. These small rituals tell your brain what comes next, even if the room stays the same. Practical Adjustments That Support Both Modes Before making changes, it helps to walk through your space with intention: ● Choose one area to be strictly work-focused. ● Adjust lighting so it supports concentration without glare. ● Add sound control through curtains or soft surfaces. ● Keep relaxation seating separate from your desk. ● Limit visual clutter near your primary work surface. Reliability Matters More Than You Think Nothing derails productivity faster than flickering lights or dead outlets. Investing in protection for your home’s electrical systems can keep workdays smooth and stress-free. A home electrical warranty can help homeowners manage unexpected repairs without scrambling for last-minute fixes. Coverage for interior electrical lines and components may include hard-wired wiring, switches, outlets, and other essentials that keep your workspace functional. Knowing those systems are covered allows you to stay focused instead of worrying about costly interruptions. A Quick Comparison of Shared-Space Choices Here’s a simple way to evaluate what belongs in a dual-use room. Element Type Better for work Better for Relaxation Bright task lighting Yes No Soft textiles No Yes Mobile furniture Yes Yes Visible storage Yes No Smart Questions Homeowners Ask Below are common questions homeowners ask when blending work and living spaces. Is it realistic to use one room for both work and relaxation? Yes, as long as the space has clear cues for each purpose. Visual and sensory signals help your brain switch modes. Without those, the room can feel confusing or stressful. Do I need expensive furniture to make this work? No, thoughtful placement matters more than price. Simple changes like lighting and storage can have a big impact. Comfort and function should guide your choices. How do I stop work from bleeding into my evenings? Create a daily shutdown routine that physically changes the room. Even small actions can mark the end of the workday. Over time, this habit reinforces boundaries . What if I don’t have space to store work items? Use closed containers or cabinets to hide work tools. Visual clutter keeps your mind in work mode. Concealment helps you relax faster. Is maintenance really part of productivity? Absolutely. Reliable systems prevent interruptions that break focus. Planning ahead reduces stress and lost time. Bringing It All Together A home that supports both work and relaxation doesn’t happen by accident. It’s built through small, intentional decisions that reinforce how each space is used. By combining clear zones, sensory cues, and reliable systems, homeowners can enjoy productive days and restorative evenings. When your home works with you instead of against you, both sides of life benefit.
Rental property owners face a constant balancing act: protecting the condition of their investment while keeping tenants satisfied enough to stay. Maintenance isn’t just an expense—it’s one of the most reliable tools for preserving long-term property value. Small tasks done consistently prevent the major failures that drain profit and frustrate renters. With the right rhythms and systems in place, landlords can turn routine upkeep into a competitive advantage. Key Takeaways ● Proactive upkeep lowers long-term repair costs and boosts tenant retention. ● Small recurring tasks (filters, seals, drainage checks) prevent big failures. ● Good documentation, clear communication, and reliable vendors are your hidden superpowers. ● Exterior care, interior finishes, and mechanical systems all need timed cycles, not reactive fixes. Preventive Habits That Shield Your Asset Maintenance is not a “fix when it breaks” discipline; it’s a defensive schedule. Landlords who adopt preventive routines typically enjoy steadier cash flow, fewer emergencies, and more predictable lease cycles. Strong habits also make your property stand out in competitive markets where renters have options. Task / Frequency / Why It Matters Inspect HVAC filters Every 1–3 months Protects motors, stabilizes energy costs Test smoke/CO detectors Twice yearly Ensures life-safety compliance Flush water heater Annually Extends tank life and improves efficiency Check caulking around tubs/sinks Quarterly Prevents water damage and mold Review exterior drainage Start of each season Avoids foundation or landscaping issues Interior Upkeep That Shapes a Tenant’s First Impression Tenants tend to judge a rental’s care level by what they can see—and what they can’t avoid. That makes interior upkeep incredibly influential: ● Well-fitted doors and windows that latch smoothly ● Reliable plumbing with no drips or slow drains ● Clean, functional flooring without loose edges or tripping points ● Appliances that work consistently and quietly ● Light fixtures that use common, easily replaced bulbs Even small oversights here influence how tenants perceive your professionalism, which affects how they treat the property in return. Exterior Care That Prevents Expensive Future Repairs Curb appeal isn’t just aesthetics—it’s mood-setting infrastructure. Regular landscaping, clean walkways, properly sloped soil, and trimmed shrubs prevent hazards and moisture issues. Gutters, in particular, deserve early-season attention; unchecked debris can lead to roof leaks and fascia rot. A Step-by-Step System for Staying Ahead of Repairs Document everything you own. Inventory major systems (HVAC, roof, appliances), noting age and expected lifespan. Assign maintenance cycles to each system. Use manufacturer recommendations as your baseline. Create an annual maintenance calendar. Seasonal scheduling prevents overwhelming workloads. Pre-hire a roster of service pros. Good electricians, plumbers, and roofers save hours when emergencies happen. Communicate expectations with tenants. Outline reporting requirements and response timelines in writing. Log and timestamp all maintenance tasks. Clear records reduce liability and increase resale value. Electrical Updates That Boost Safety and Tenant Confidence Electrical systems age quietly, and tenants care deeply about reliability. When addressing wiring, outlets, lighting circuits, or panel upgrades, prioritize both safety and code alignment. Using high-quality parts from reputable manufacturers helps ensure the improvements last and reduces the risk of repeat issues. Rental owners should source dependable components and accessories from an established electrical supply provider to ensure repairs are built on solid foundations. Why Professional Painting Helps Long-Term Value One of the most visible improvements you can make is paint. Quality finishes protect surfaces, reduce scuff visibility, and send a strong message that you care about the property. Light Bridge Construction handles surface prep, priming, and finish application with consistency, helping rentals stay inviting between tenants. Routine repainting also prevents moisture intrusion, supports easier turnover, and enhances your ability to command competitive rates. Seasonal Maintenance Moves That Pay Off Quickly Here are quick, high-impact seasonal tasks that keep your property running smoothly: ● Clear HVAC condensation lines before summer. ● Inspect weather stripping before winter storms. ● Check tree branches after heavy winds. ● Clean dryer vents to reduce fire hazards. ● Touch up exterior paint where sun exposure is strongest. Tenants may never notice these actions—but they always benefit from them. Frequently Asked Questions How often should landlords inspect rental units? Most owners schedule a walk-through annually or semi-annually, ensuring they’re not intrusive while still catching early issues. Is it better to repair or replace older appliances? If an appliance is reaching the end of its expected lifespan and repairs exceed 50% of the replacement cost, replacing usually wins. Can tenants perform their own maintenance? Minor tasks like replacing lightbulbs or checking breaker switches are reasonable; anything involving plumbing, wiring, or structural elements should remain with the landlord. Final Thoughts Consistent maintenance is one of the most reliable ways to protect rental property income. When landlords invest in preventive care, tenants feel safer and stay longer. Reliable vendors, strong documentation, and seasonal routines work together to reduce stress and increase profitability. Treat maintenance as an ongoing system—not a reaction—and your rentals will reward you for years to come.

For many people, the word downsizing once carried a sense of loss — fewer rooms, fewer belongings, fewer symbols of status. But in a changing world where mobility, sustainability, and well-being matter more than square footage, downsizing has quietly evolved into something revolutionary. It’s no longer about giving up space; it’s about gaining control. A Quick Take: What You Gain When You Let Go ● Financial flexibility: Lower housing costs mean higher personal freedom. ● Simplified living: Less clutter, less maintenance, more mental clarity. ● Lifestyle freedom: Room to travel , explore, and redefine what “home” really means. Whether it’s a young couple seeking adventure, empty nesters chasing simplicity, or digital nomads designing a lighter footprint, downsizing can become a strategic reset — a deliberate choice to make life more intentional. The Financial Freedom Factor The math of downsizing is simple — but its psychological effects are profound . Selling or renting out a larger home and moving into a smaller, energy-efficient space can reduce costs by thousands of dollars each year. Mortgage payments shrink. Utility bills fall. And that financial flexibility often translates into something far more valuable: choice. Many who downsize use the extra funds to travel, pursue hobbies, or finally start the business they’ve dreamed about. It’s a form of “liquid freedom” — the ability to redirect resources from maintenance to meaning. Refreshed Spaces for a Refreshed Life When moving into a smaller space, every design decision counts. One of the most transformative — yet cost-effective — upgrades is refreshing the environment itself. A new color palette, cleaner textures, or modern finishes can make a compact home feel bright, open, and new. That’s where Light Bridge Construction comes in. Their team specializes in both interior and exterior painting, offering tailored design consultations and efficient project execution. By reimagining your walls and finishes, they help homeowners create a personalized atmosphere that reflects their new lifestyle — one that feels purposeful, not pared down. How to Simplify Without Sacrificing Step 1 – Define Your New Priorities: Decide what experiences or goals matter most in this new chapter — freedom, travel, minimalism, or security. Step 2 – Audit Your Space: Ask: What do I use? What do I love? What supports my lifestyle today — not five years ago? Step 3 – Start Small: Begin with one room. Downsizing isn’t a race; it’s a redefinition. Step 4 – Digitize and Donate: Scan old files , let go of duplicates, and donate useful items to give them new life. Step 5 – Redesign for Flow: Smaller spaces thrive on smart design. Use mirrors, light colors, and multi-functional furniture. Investing in Your Fresh Start Downsizing doesn’t just save money — it creates opportunity. The time and funds you reclaim can be reinvested into your personal growth or career development. Many adults use this transition to pursue new education pathways, including online programs that align with their next phase of life. An option worth considering is earning a degree that supports long-term career reinvention or stability. For example, online healthcare degrees allow learners to study from anywhere while preparing for careers that make a tangible difference in people’s lives. Online programs provide flexibility — so you can build a future that fits your new, streamlined lifestyle while contributing meaningfully to community health and well-being. Comparing Before & After Downsizing Aspect Before Downsizing After Downsizing Monthly Expenses High mortgage, utilities, and maintenance Reduced costs and higher savings Living Space Underused rooms and storage Efficient, intentional use of space Mental Load Clutter , upkeep, decision fatigue Simplicity, focus, and peace Time Freedom Bound by chores and bills More time for family, travel, learning Sense of Control Attached to possessions Empowered by priorities FAQ: Common Questions About Downsizing Q1: Is downsizing only for retirees? No — millennials, remote workers, and young families are increasingly embracing smaller spaces for flexibility and lower overhead. Q2: How do I know what to keep or let go? If it doesn’t serve your daily life or spark meaning, it’s clutter. Start with categories (clothing, kitchenware, books) and set clear limits. Q3: Won’t I miss having space? Maybe — but you’ll gain freedom. Most people adapt quickly when they design their new home to reflect how they actually live, not how they used to live. Resource Spotlight: Embrace Simplicity, Mindfully If you want guidance on creating a minimalist lifestyle that aligns with mental clarity and emotional well-being, explore The Minimalists Podcast . It offers stories and practical strategies for intentional living — perfect for anyone stepping into a simpler chapter. Living Lighter, Living Better Downsizing isn’t about losing space — it’s about gaining alignment. When you trade clutter for clarity, maintenance for momentum, and size for substance, you open a door to something better: a life that fits your values, not your storage unit. Simplifying where you live can simplify how you live — and that’s the ultimate luxury.

Ever looked at that awkward little wall in your home and thought, “What do I even do with this?” You’re not alone. Many people struggle to make use of small or narrow spaces that seem too insignificant to decorate. But here’s the secret: those tiny walls can actually transform the way a room feels. With the right decorating solutions, you can turn even the smallest wall into a beautiful focal point. This guide will show you how to make a small wall work for you, offering smart, stylish, and practical ideas that add charm and purpose to those overlooked spots. Let’s explore how to make every inch count. Why Small Walls Matter More Than You Think A small wall might seem unimportant, but it actually affects how your room looks and feels. It can balance large furniture, highlight a design theme, or draw the eye to a specific area. Many interior designers say these walls are hidden gems waiting for attention. When you decorate a small wall thoughtfully, it can do several things at once. It can add depth, showcase your style, and even make a room look larger. Small spaces force creativity, which often leads to more interesting results. So before you ignore that corner again, remember that small walls offer big design opportunities. Small Wall, Decorating Solutions That Work Let’s talk about how to make the most out of limited space without overcrowding it. These decorating solutions for awkward spaces will help you add both style and function. 1. Use Floating Shelves to Add Character Floating shelves are one of the most versatile ways to dress up a small wall. They don’t take up floor space, yet they create room for décor, plants, or books. Start by choosing shelves that match your room’s tone. Wood adds warmth, while white shelves keep things airy. You can mix decorative items like framed photos and small sculptures for visual interest. Even a single shelf can change how that wall feels. Keep it uncluttered and let a few key items stand out. 2. Hang a Gallery of Small Artworks If you love art but lack wall space, a gallery wall is your answer. Use several small frames rather than one large piece. This draws the eye up and gives depth to your space. You can display family photos, travel shots, or art prints that tell a story. Mix frame shapes and sizes, but keep a consistent color theme for balance. The result feels intentional, lively, and personal. It’s a great way to bring emotion and life to your home. 3. Add a Statement Mirror Mirrors do more than reflect your image. They also reflect light and make rooms look bigger. A small wall becomes visually spacious when you hang a mirror with character. Choose round or oval mirrors for softer lines, or go for geometric designs for a modern touch. You can also place a mirror opposite a window to enhance natural light. This simple trick instantly transforms a dull corner into a bright, inviting area. 4. Create a Mini Vertical Garden Plants breathe life into any space, and a small wall is a wonderful spot for greenery. A vertical garden doesn’t need much room, just a few mounted planters or small hanging pots. You can grow herbs in the kitchen, succulents in the living room, or vines that cascade down beautifully. It’s practical and adds a refreshing natural touch to your décor. Just make sure your plants get enough light and choose low-maintenance varieties for ease. 5. Make It Functional with Hooks or Racks Sometimes, decorating isn’t just about looks, it’s about usefulness too. Hooks and wall racks can make small walls practical. You can hang keys, hats, coats, or even your dog’s leash near the entryway. Choose stylish hooks in metal or wood to add visual appeal. This solution helps declutter the area while making it look intentional and neat. 6. Try Removable Wallpaper or Wall Decals If you rent or don’t want to commit to painting, removable wallpaper is a smart choice. It’s easy to apply and comes in endless designs. Go for light colors to open up the space or bold patterns to create contrast. Wall decals are another easy way to bring personality to tight spots. When you’re ready for a change, just peel them off and start fresh. 7. Turn It into a Reading Nook Backdrop Got a small wall near a corner? Add a cozy chair, a small side table, and a lamp. Then decorate the wall with soft artwork or minimal shelves. This setup turns an unused area into a peaceful nook. You can read, relax, or sip coffee there. The wall becomes the background for a small but meaningful space in your home. 8. Use Lighting as Decoration Light fixtures can double as art, especially in small spaces. A stylish wall sconce or string lights can create both function and mood. Warm lighting makes a room feel inviting, while cool lighting adds a modern edge. Try positioning the light to highlight décor pieces or textured walls. Lighting can truly elevate your design when space is limited. 9. Paint a Feature Section Paint can make a big difference, even on a tiny wall. A bold color or accent pattern helps define the space and adds personality. You don’t need to paint the whole wall. Try painting a vertical stripe or a half-wall effect for a modern look. This adds visual height and gives your wall a stylish, intentional feel. 10. Display Floating Furniture Ever seen wall-mounted desks or nightstands? They’re sleek, practical, and look amazing in small areas. Install a small floating desk for a mini workstation, or mount a slim shelf near your bed for storage. These pieces save floor space and keep your room open. Add a few well-chosen accessories, and you’ve created something both useful and stylish. 11. Add Texture with Woven Art or Panels Texture adds depth to small spaces. You can hang woven wall art, macramé, or wooden panels to create dimension. These materials break up flat surfaces and make the room feel layered. They also soften the look and make a small space feel cozy. Keep it balanced by using one or two statement pieces instead of many small ones. 12. Make Use of Corners Corners are often forgotten, but they can be design opportunities. A narrow corner shelf, plant stand, or small mirror can fill the gap nicely. Use it for décor that adds color and character, like a vase or a photo frame. Small changes can make a big difference here. It’s all about using what’s available instead of letting it sit empty. 13. Add a Chalkboard or Message Wall Turn a small wall in the kitchen or hallway into a chalkboard. It’s both fun and functional. Use it for grocery lists, quotes, or reminders. Families love it because it keeps things organized while adding a creative touch. Pair it with a simple frame or a painted border to define the area. 14. Incorporate Air Duct Cleaning Awareness While designing your space, it’s important to consider the air quality too. Decorating can stir up dust, especially near vents. That’s why air duct cleaning plays a role in home design. Clean ducts improve airflow and keep your decorative areas dust-free. It’s a small maintenance step that protects both your décor and your health. After all, even the most beautiful space feels better when the air is clean. 15. Blend Style and Storage Small walls can become storage spaces without losing charm. Use wall-mounted baskets or slim cabinets that blend with your color scheme. They hold small items like mail or magazines while looking stylish. Try woven baskets for warmth or sleek metal for a modern vibe. This approach keeps clutter away and makes your small space work smarter. 16. Use Art to Define Mood Art has a way of changing how you feel in a room. For small walls, choose art that matches your desired vibe. A calming landscape adds peace to bedrooms, while bold abstract art energizes hallways. Don’t be overcrowded, just one or two framed prints can say a lot. The key is to make your wall speak to your personality. 17. Hang a Clock with Character A beautiful clock can be both decorative and practical. Choose a large statement clock for a minimal wall or a small modern one for tight spaces. Clocks add movement and serve a purpose too. They bring rhythm to your space without overpowering it. Match the style to your room’s theme for a cohesive look. 18. Install a Slim Picture Ledge Picture ledges are narrow and elegant, perfect for displaying art, candles, or collectibles. You can easily rearrange them whenever you want a new look. They work well in entryways, bedrooms, or behind sofas. You get display flexibility without needing to drill multiple holes. It’s an effortless way to refresh your wall regularly. Common Question: How Can I Make a Small Wall Look Bigger? Many people ask this. The simplest way is by using mirrors, light colors, and vertical lines. Mirrors expand visual space, while light shades reflect light. Vertical stripes or tall artwork guide the eyes upward, creating a sense of height. Avoid heavy frames or dark tones that crowd the wall. The trick is to keep things light, airy, and balanced. 19. Add a Pop of Personality A small wall gives you freedom to experiment. Use it to display something unexpected, like a vintage map, a handmade wreath, or even hanging musical instruments. It’s a way to express creativity without committing to a full-room theme. Each piece tells a story and sparks conversation. This is where your style can shine in small but powerful ways. 20. Don’t Forget the Power of Simplicity Sometimes, less truly is more. You don’t have to fill every inch. A single artwork, a mirror, or a plant can make the wall complete. Too much decoration can make a space feel cramped. Instead, aim for a balanced look that feels intentional and calm. Simplicity gives breathing room and allows your favorite elements to stand out. Final Thoughts Decorating small walls doesn’t have to be complicated. With these Small Wall Decorating Solutions , you can transform awkward spaces into beautiful highlights of your home. Every corner holds potential, whether it’s for art, plants, or smart storage. The secret lies in seeing these walls not as limitations but as opportunities. Use creativity, pay attention to proportions, and keep things personal.

Introduction: Why Maximalism Is Making a Comeback Minimalism had its moment, but now maximalism is stealing the spotlight. Homes are becoming more expressive, colorful, and unapologetically bold. People are tired of blank white walls that feel lifeless. Instead, they’re embracing design that reflects personality and creativity. An artistic feature wall is one of the most exciting ways to bring maximalism into your home. It’s a statement piece that transforms any space from simple to unforgettable. Whether you’re a seasoned decorator or just starting, creating one doesn’t have to be complicated. You just need the right mix of vision, confidence, and design balance. What Is an Artistic Feature Wall? An artistic feature wall is a visually dominant wall in a room that draws attention through art, color, or texture. It acts as the focal point of the space, setting the tone for everything around it. You can create one with bold wallpaper, murals, paint techniques, or a curated mix of art pieces. The goal isn’t perfection but expression. Every artistic feature wall tells a story and captures the personality of the person living there. Many designers use this wall to experiment with different styles without overwhelming the entire room. It’s your creative canvas, and there are no strict rules—just opportunities. The Rise of Maximalism in Home Decor Maximalism celebrates abundance. It’s about mixing patterns, layering colors, and combining old with new. Unlike minimalism, which aims for simplicity, maximalism thrives on personality. Homeowners are drawn to this style because it feels alive. A bold, artistic feature wall is the essence of this approach. It lets you express individuality while maintaining visual harmony. With streaming shows, social media trends, and interior design influencers showcasing colorful homes, maximalism has become mainstream again. People are realizing that creativity makes spaces feel more personal and comforting. Why Create an Artistic Feature Wall? Every home deserves a standout element that reflects its character. An artistic feature wall does exactly that while enhancing mood and depth. Here’s what it offers: Instant Visual Impact – It becomes the centerpiece of the room, grabbing attention immediately. Personal Expression – It allows you to showcase your personality through color, pattern, and art. Affordable Transformation – You can change an entire room’s feel without a full renovation. Flexibility – It can evolve as your style changes over time. Even small spaces can benefit from this design approach. A single artistic feature wall adds energy, warmth, and texture that a neutral palette can’t provide. Choosing the Right Wall Selecting the right wall is crucial. It should naturally catch your eye when you enter the room. Usually, that’s the wall behind a bed, sofa, or fireplace. Avoid walls with windows or too many openings since they break the visual flow. Keep the focus on one continuous surface for the strongest impact. Once you choose your wall, take a moment to stand back and observe how light interacts with it throughout the day. The play of sunlight and shadows will influence how colors and textures appear. Playing with Color Color defines the tone of your feature wall. Deep jewel tones like emerald, navy, or maroon create drama. Bright hues such as mustard or coral bring energy and optimism. For a cohesive look, pull accent colors from nearby furniture, rugs, or art pieces. This ensures your artistic feature wall feels intentional rather than random. Experimentation is key. If you’re nervous, start with a smaller area first. Paint samples on the wall, live with them for a few days, and observe how they feel in natural and artificial light. Textures and Materials That Pop Texture adds another layer of interest to an artistic feature wall. It transforms flat surfaces into tactile experiences that invite touch and curiosity. Some creative options include: ● Plaster or limewash finishes for a soft, aged look ● Wood panels or slats that introduce warmth ● Fabric or tapestry to add depth and comfort ● Mirrors or metallic accents for reflective elegance Combining textures can amplify the maximalist feel. You can pair a velvet wall covering with metallic frames or mix matte paint with glossy tile. Balance is what keeps it visually rich without becoming chaotic. Artistic Elements That Make It Unique An artistic feature wall thrives on originality. Beyond paint or wallpaper, consider adding hand-painted designs, stenciled patterns, or wall sculptures. Gallery walls are also an excellent option. Combine artwork, framed photos, and mirrors of varying sizes. Arrange them creatively to create movement and flow. Another growing trend is mural-style painting. Whether abstract shapes or nature-inspired scenes, murals make your wall look like a living artwork. If you’re not confident with a brush, peel-and-stick mural wallpapers are fantastic alternatives. Mixing Patterns Without Overwhelming the Space Maximalism often involves pattern mixing, but it requires some planning. You want bold, not busy. Start with one dominant pattern, like large florals or geometric shapes. Then, introduce smaller or subtler designs in matching tones. The trick is keeping the color palette consistent. For example, if your main wallpaper has emerald and gold, choose art or cushions with similar shades. That connection ties everything together while keeping the look cohesive. Lighting Matters More Than You Think Lighting dramatically affects how your feature wall appears. The right lighting can highlight textures, deepen colors, and enhance visual interest. Use layered lighting for the best results: ● Ambient lighting to set overall tone ● Accent lighting to highlight art or textures ● Task lighting for practical areas nearby Warm light adds coziness, while cooler tones enhance modern designs. Always test your lights after finishing the wall to adjust their direction and brightness. How to Make It Feel Balanced Balance prevents maximalist design from feeling chaotic. Pair your artistic feature wall with neutral surroundings so it remains the star of the space. If your wall is bright or detailed, keep adjacent walls soft and simple. Use furniture in complementing tones to anchor the design. Plants, rugs, and cushions can also help tie the look together. The goal is to make everything feel connected, not competing. Common Question: Can I Create an Artistic Feature Wall in a Small Room? Yes, absolutely. Many people think bold walls make small rooms feel smaller, but that’s not true. The right design can expand the space visually. Choose medium or dark tones that add depth. Reflective surfaces or metallic paints can create light play, making the room appear larger. The secret lies in balance. Keep other elements lighter or minimal so your wall remains the hero without crowding the area. Budget-Friendly Ways to Build an Artistic Feature Wall You don’t need a big budget to make an artistic statement. Here are affordable ideas that still deliver stunning results: Peel-and-stick wallpaper – Easy to install and remove without damage. DIY painted murals – Use painter’s tape for shapes or gradients. Photo collage wall – Mix prints, travel photos, and artwork. Fabric or curtain backdrop – Adds softness and color without paint. Vinyl decals or quotes – Offer personal flair with minimal effort. Creativity matters more than cost. With thoughtful planning, you can achieve a high-end look on a modest budget. Keeping It Clean and Maintained Once your artistic feature wall is complete, maintaining it keeps it beautiful for years. Regular dusting and gentle cleaning protect colors and textures. Avoid harsh chemicals, especially if you’ve used fabric, wallpaper, or specialized paint. For textured finishes, a soft brush or microfiber cloth works best. It’s also smart to handle household maintenance, like duct cleaning Utah services, which keep air quality high and prevent dust buildup that could dull your feature wall’s appearance. Long-Term Style Evolution Your artistic feature wall can evolve as trends change. The beauty of maximalism is its flexibility. You can swap out artwork, repaint sections, or add new textures anytime. Seasonal décor also keeps it fresh. Try rotating art or adding greenery for spring, candles for winter, or vibrant prints in summer. This approach makes your home feel dynamic and keeps your creativity flowing. Mistakes to Avoid To keep your project stylish, avoid these common pitfalls: ● Using too many clashing colors without a linking theme ● Overcrowding the wall with unrelated art pieces ● Ignoring the rest of the room’s balance ● Forgetting about proper lighting placement ● Skipping wall preparation before painting or wallpapering Taking time to plan ensures a polished result that feels intentional, not messy. Expert Tips for a Cohesive Look Create a mood board – Gather inspiration images before starting. Use color repetition – Repeat at least one tone throughout the room. Balance bold with calm – Add breathing space with neutral accessories. Test samples – Always test color and texture in natural light first. Stay true to your taste – Your artistic feature wall should reflect you. These details turn good design into great design. When every element feels connected, the room instantly feels complete. The Emotional Power of an Artistic Feature Wall Art influences how we feel. A rich wall design can boost mood, creativity, and comfort. Warm tones bring energy, while cooler hues calm the mind. Textures add depth that invites touch and curiosity. Each detail reminds you that your home is an extension of who you are. That emotional connection is why maximalism resonates so deeply—it celebrates life in full color. Conclusion: Your Home, Your Expression Maximalism encourages you to live boldly and design fearlessly. An artistic feature wall is the perfect way to express that spirit in your space. It transforms ordinary walls into meaningful art that reflects who you are and what inspires you. Whether you choose paint, wallpaper, or a gallery of memories, remember that your wall should feel authentic to you. Take risks, mix styles, and let your creativity guide you.
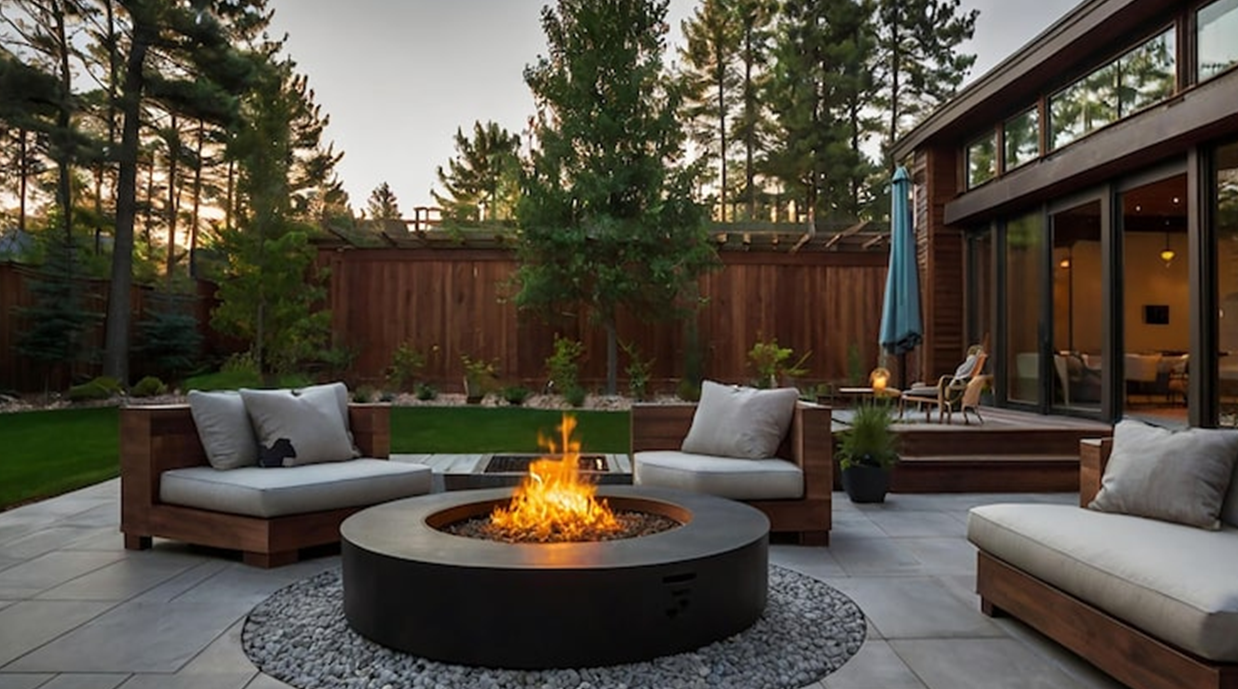
When you think about relaxing outdoors, your mind might wander to sunny summer days, backyard barbecues, and laughter around a crackling fire. But what if you could enjoy your outdoor space all year long, no matter the season? That’s exactly what outdoor living redefined is about—transforming your backyard into a cozy, functional retreat that suits every type of weather. Whether it’s a warm July evening or a crisp November morning, you can still enjoy the comfort of your outdoor oasis. What Does “Outdoor Living Redefined” Really Mean? Outdoor living redefined means going beyond basic patio furniture or a seasonal setup. It’s about creating a backyard that functions as an extension of your home. You’re not just adding a few chairs; you’re designing an outdoor environment that feels just as inviting as your living room. This new approach blends comfort, functionality, and style. It’s about using materials and design elements that stand up to the weather while still looking beautiful. More people today are turning their backyards into all-season spaces, complete with heating, lighting, and shelter options that make outdoor living possible every month of the year. When done right, your backyard can become your favorite part of your home—somewhere you can unwind, entertain, and even work from. How to Plan Your Year-Round Outdoor Living Space Planning a space that works year-round starts with understanding your needs and climate. Do you want to entertain guests, relax alone, or both? Is your area known for heavy rain or snow? Think about how you’ll use the space before you start decorating. A few key things to consider: ● Functionality – Make sure every zone in your outdoor space has a purpose. A lounging area, dining space, and a cooking section each serve a role. ● Comfort – Invest in weather-resistant furniture with cozy cushions that can be stored or covered during bad weather. ● Durability – Use materials like stone, concrete, and treated wood. They last longer and look great through every season. Planning thoughtfully will help your backyard become a functional and beautiful extension of your home. Comfort in Every Season: Heating and Cooling Solutions To enjoy your backyard year-round, temperature control is essential. It’s what makes outdoor living redefined truly possible. In colder months, add outdoor heaters or fire pits. They not only provide warmth but also create a welcoming ambiance. A built-in fireplace or gas heater can keep guests comfortable even on chilly evenings. For summer, shade is your best friend. Install pergolas, umbrellas, or retractable awnings to block the sun while still letting in fresh air. Ceiling fans or misting systems can keep things cool on the hottest days. A comfortable temperature makes all the difference between a space you occasionally use and one you love daily. Shelter and Shade: Creating an All-Weather Zone A backyard retreat needs protection from the elements. Rain, wind, and sunlight can all affect your comfort. Adding covered areas helps make your outdoor space usable in any season. Pergolas and gazebos work beautifully to define spaces while offering shade. If you prefer something more flexible, consider retractable canopies or outdoor curtains. These options let you control how much light or privacy you want. For a complete all-weather setup, many homeowners add enclosed patios or glass walls that can open in summer and close during cooler months. This helps blend the indoor and outdoor experience seamlessly. Lighting That Extends the Day Outdoor lighting is one of the easiest ways to make your backyard feel inviting year-round. It sets the mood, enhances safety, and allows you to enjoy your space after sunset. String lights and lanterns create a cozy atmosphere for evening gatherings. Pathway lights keep walkways safe, while wall-mounted fixtures highlight architectural features. You can even use solar-powered lights to cut down on energy use. A smart lighting setup transforms your backyard from a daytime retreat to a nighttime escape. The right balance of brightness and warmth will make it feel magical in every season. Outdoor Kitchens and Dining Spaces Nothing says outdoor living is redefined like a backyard kitchen or dining area. It turns your space into a true entertaining hub. Imagine cooking under the stars or enjoying a weekend breakfast surrounded by nature. You don’t need a massive setup to make it functional. Start with a sturdy grill, a small countertop, and a dining table that seats your family comfortably. Over time, you can expand with a sink, storage, and even a mini fridge. Adding weather-resistant materials ensures everything lasts. Stainless steel and stone are both great choices because they handle outdoor conditions well and are easy to maintain. Backyard Seating Ideas for Every Mood The right seating can make or break your backyard experience. Whether you want to lounge with a book, chat with friends, or nap in the sun, your furniture should match your lifestyle. Try a mix of seating types. Sofas, loungers, and dining chairs can create layers of comfort. Hammocks or hanging chairs add a fun touch while encouraging relaxation. Arrange seating in small clusters for conversation or around a fire pit for cozy evenings. The goal is to make the space feel natural and welcoming, no matter the season. Adding Greenery and Natural Elements Plants bring color, life, and freshness to any outdoor retreat. They make the space feel peaceful and vibrant at once. You can mix flowers, shrubs, and small trees to create visual interest. Evergreens are a great option because they stay lush year-round. Adding potted plants lets you change the look seasonally. In colder months, move them closer to the house or into a covered area. Water features like fountains or small ponds add a soothing element. The sound of flowing water can make your space feel more relaxing and inviting. Entertainment Options for Year-Round Enjoyment Your outdoor living redefined setup can also include entertainment. Think about how you’ll use the space for fun and connection. Install an outdoor sound system to enjoy music or podcasts while relaxing. A weatherproof TV can make movie nights unforgettable. Games like cornhole or bocce ball add energy to gatherings. Even during winter, cozy up with blankets and watch your favorite shows under the stars. Having entertainment ready for every season keeps your backyard feeling alive and useful all year. Maintenance Tips to Keep Your Space Fresh A beautiful backyard requires some care. Regular maintenance ensures your outdoor retreat stays functional and inviting. ● Clean surfaces often to prevent mold or dirt buildup. ● Protect furniture with covers during harsh weather. ● Check lighting and heating equipment for safety. ● Trim plants regularly to keep everything neat and healthy. Interestingly, maintaining indoor systems can also enhance your outdoor comfort. For instance, air duct cleaning inside your home helps improve airflow, making it easier to manage both indoor and outdoor temperatures efficiently. Keeping everything in good condition helps your backyard stay ready for any occasion. Answering a Common Question: How Can You Enjoy Outdoor Living in Winter? Many homeowners wonder if outdoor living redefined can truly work during winter. The answer is yes, with the right setup. Add heat sources like fire pits or patio heaters. Layer your furniture with thick cushions and warm throws. Enclose certain areas with screens or glass panels to block the wind. You can even use warm lighting and outdoor rugs to make the space cozy. When designed thoughtfully, your backyard can stay enjoyable even in the coldest months. Sustainable and Smart Upgrades for Modern Outdoor Spaces Sustainability plays a growing role in how people approach outdoor living today. Choosing eco-friendly materials and energy-efficient systems can make your backyard greener in every sense. Solar lights, rainwater collection systems, and native plants help reduce your environmental footprint. You can also use recycled or reclaimed materials for decking and furniture. Smart home technology can enhance convenience too. Automated lighting, sound systems, and temperature controls allow you to manage everything easily from your phone. This balance between sustainability and technology is what makes modern outdoor living truly redefined. Personal Touches That Make It Yours Your backyard retreat should reflect your personality. Add items that make you happy. It could be a collection of outdoor art, cozy textiles, or custom-built furniture. Even small details like decorative pillows, planters, or rugs can transform the atmosphere. A few thoughtful choices can make your backyard feel uniquely yours. Whether it’s a cozy reading nook or a lively gathering space, make it fit your lifestyle. That’s what gives outdoor living redefined its charm. Creating Flow Between Indoor and Outdoor Spaces A seamless transition between indoor and outdoor spaces helps both areas feel larger and more connected. Wide glass doors, matching flooring, or consistent color schemes can achieve that flow. Your Backyard, Your Everyday Escape Outdoor living redefined isn’t just about aesthetics. It’s about creating balance, comfort, and connection with nature. Whether you’re enjoying a quiet morning coffee or hosting friends by the fire, your backyard becomes a place to live fully all year. With the right mix of design, functionality, and maintenance, you can turn your outdoor area into an everyday escape. From cozy winter evenings to breezy summer nights, every season becomes a reason to step outside and enjoy your own piece of paradise. Conclusion: Redefining Outdoor Living for Every Season Outdoor living redefined is about transforming your backyard into a welcoming retreat that works year-round. It’s not just about adding furniture or décor; it’s about designing an outdoor environment that feels like a natural extension of your home. By focusing on comfort, weather protection, lighting, and sustainability, you create a space that adapts with the seasons. You can enjoy warm gatherings in winter, peaceful mornings in spring, vibrant barbecues in summer, and cozy evenings in autumn—all without ever feeling limited by the weather. When planned thoughtfully and maintained well, your backyard becomes more than a seasonal escape. It turns into a personal sanctuary where you can relax, connect, and recharge all year long. That’s the true meaning of outdoor living redefined. When both areas complement each other, you’ll naturally spend more time outside. Add outdoor lighting that matches your indoor style for harmony. It’s a subtle touch, but it makes a big difference in creating a cohesive experience.

Buying a new home is a huge milestone—financially, emotionally, and logistically. But once the paperwork is signed and the moving truck drives off, the real work begins: making your new house feel like home. This transition period can feel chaotic, but it’s also a rare and powerful moment to reset routines, organize your space, and even rethink parts of your life. The following sections offer practical, human-first tips that make getting settled less overwhelming—and maybe even inspiring. Get the Basics Running Smoothly Before you can enjoy your new space, you’ll need to make sure it’s fully functional. That means getting utilities running, making sense of trash schedules, and ensuring your internet isn’t going to flake out during your first video call. ● Contact utility providers as early as possible—some require days of lead time to activate service. Not sure where to begin? This breakdown on setting up utilities in your new home can help simplify the process. ● Check for outdated thermostats, water heaters, or fuse boxes—getting these evaluated early can prevent surprises down the line. ● Label circuit breakers and test smoke alarms the day you move in. It’s one of those five-minute tasks that could save you hours later. ● Learn your trash pickup schedule and what’s recyclable in your area—this can vary wildly from one zip code to the next. Don’t Skip Safety Just Because You’re Tired Unpacking can wait. But safety? That’s day one stuff. New homeowners are often so focused on décor and layout that they overlook basic home security and emergency prep. ● Before anything else, change the locks. You don’t know who still has keys from the previous owners—contractors, neighbors, or old roommates might still have access. ● Review this 14 key safety tips for new homeowners for a thorough security refresh, especially if you're new to standalone houses or townhomes. ● Make a fire escape plan, and if your home has upper floors, install escape ladders in bedrooms. Even if it feels extreme, you’ll sleep better knowing you have a plan. ● Install motion sensor lights and check the range of any doorbell camera systems. Visibility deters intrusions better than any fancy alarm system. Turn the Blank Canvas into Something That Feels Like You The urge to buy new furniture and paint everything on day one is strong—but resist it. You’ll live differently in this space than your last one. Give it time. That said, small decisions now can make the space functional and joyful fast. ● Unbox and place your most-used items first (think: coffee mugs, chargers, dog leashes). This creates pockets of daily normalcy even while boxes are still piled high. ● Consider paint swatches but live with them for at least a week—light changes everything. ● If you’re on a budget, don’t rush into buying everything at once. These decorating on a budget home editor‑approved tips can help make even secondhand pieces shine. ● Use temporary solutions—command hooks, peel-and-stick backsplashes, washable rugs—so you can iterate as you settle in. Use This Move as a Launchpad, Not Just a Reset A new home means a new routine. Why not let that momentum spill over into bigger life upgrades too? Moves give you a once-in-a-decade permission slip to rethink how you spend your time, who you connect with, and what your goals look like now. ● Take stock of your habits. What do you want to stop dragging from the old place into this one? Late-night scrolling? Overspending? Avoiding your to-do list? ● If you’ve been in a professional rut, consider upskilling or exploring a pivot. Earning an IT bachelor's degree through an online program like WGU allows you to study flexibly—without giving up your income or delaying progress. ● Join local groups or online communities tied to your hobbies, profession, or new ZIP code. It’s easier to form fresh connections when you’ve already left behind old rhythms. ● Let your new surroundings nudge you toward a bigger sense of possibility—be it through volunteering, a side hustle, or even rethinking where you want to be five years from now. Final Touches That Help You Settle In for Good Once the boxes are gone and the furniture is mostly in place, you’ll hit a second wave of stress: “Now what?” The truth is, getting settled takes more than unpacking. It’s about creating rhythms and rituals that make a house feel lived in. ● Build a “launchpad” area near the door for keys, bags, and outgoing mail. This reduces daily friction and keeps mornings sane. ● Print and tape a checklist of things to do after moving on the fridge—things like registering your address, transferring insurance, and updating subscriptions. ● Let your senses settle in: light a candle, cook a favorite meal, play music through real speakers. Familiar textures and scents matter more than Pinterest perfection. ● Create one cozy corner—whether it’s a reading nook, a deck chair, or just a blanket pile in the living room—that can be your fallback zone when the rest of the house is still chaos. Settling into your new home isn’t a checklist to complete—it’s a process of becoming. With every shelf you mount, every neighbor you wave to, and every decision you make in this space, you’re shaping the next version of your life. Take your time, make it yours, and use this transition not just to get comfortable—but to get going. Transform your home into a masterpiece with Lightbridge Construction Services — where your dreams meet reality with professional, timely, and stress-free service!
